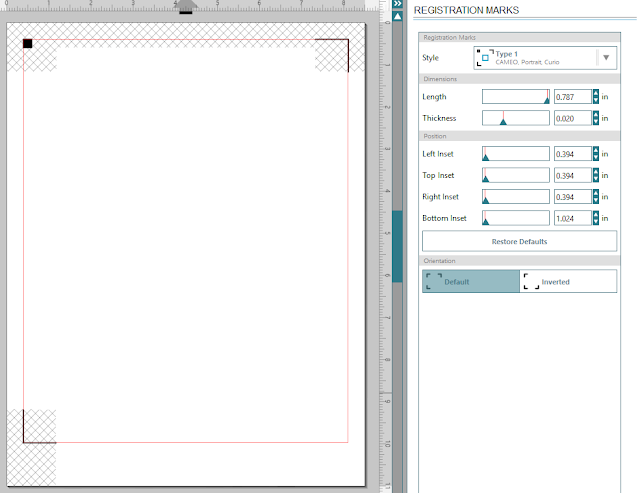
Step 1: Set up your work area. For mine I am using an 8.5" x 11" work area. I have my both my print and cut borders showing. I also have my registration marks showing. My insets are all turned down to the minimum amount.
Step 2: Lets start with creating three circles of different sizes. My sizes are 0.75", 0.5", and 0.3". Check out my tutorial post titled Shapes! if you need instructions on making and sizing circles.
Step 3: Create an offset of about 0.030 inches around each circle. Remember to make sure the offset is set to "No Cut".
Step 4: (optional) Set up your layers so that changing the theme of this document will be faster in the future. Future you will thank you.
Step 5: Now highlight both the cut line and the offset. Using the replicate tool, duplicate the circles until they go to the other side of the work area. Remove any circles that fall outside of the cut area.
 |
| Oooooo so many circles... pun not intended, but it was too amusing to not keep. |
Step 6: Next we will create some Washi tape. Make three rectangles. All of them will be around 7" long. The heights can vary depending on your desired thickness of Washi tape. I will be making three different widths: 0.3", 0.5", and 0.75".
Step 7: Create an offset of .03" just like we did in step 3. Don't forget to check your cut lines. At this time I also like to extend the length of my Washi tape to fill the whole width of the page (optional). Duplicate the Washi tape if you would like additional pieces.
Step 8: Time to make two simple banners. To start, make two rectangles. Mine will be .5" x 1" and the other will be 2" x .5" but make yours whatever size will fit your needs. I then like to make two guide lines and center the rectangles on the guides. It makes the next step a bit easier.
Step 9: Select the smaller rectangle. Click on the 'Point Editing' tool. Create a fifth point by clicking in the center of the bottom line (see image below). Use the up arrow key on your keyboard to move the newly created point until you are happy with the banner.
 |
| The guide made finding the center of the rectangle super easy. Would recommend. |
Step 10: Next, create two points on the larger rectangle, one on each end. Use your arrow keys to move the newly created points inward.
 |
| Be sure to count how many times you move the center point inward so you can do that same number on the other side. |
Step 11: Make an offset for each banner. Don't forget to check your cut lines! Duplicate to fill in your sheet.
 |
| Almost finished. |
Step 12: Decorate your dots, banners, and Washi tape!
Step 13: Print and cut your new stickers!!!
Here are a couple close ups of the Washi tape and dots. I just love these designs!
Thanks for following along. For other stickers that I have made using my Silhouette Cameo check out my etsy store or click the "Projects" tab in the menu in the upper right of this blog. Please let me know in the comments if you have any questions about this project.


No comments:
Post a Comment